Pages

Sunday, March 30, 2014

MISTical March: Gesso, Mist and Punches


The idea for this last MISTical March page came from an Art Journal page by Kim Beinschroth.  On her page she used gesso and mist around a magazine clipping.  I used these on my photo.

It seems a little scary to spread modeling paste and gesso over your photo.  However, this definitely isn't the best photo of me.  It is a fun selfie taken last summer when we were splurging on ice cream from Kilwins.

We are both chocolate lovers but I used sherbet colors for the page and drips to continue the ice cream theme.  Now, our ice cream never gets a chance to drip!

Here are a few closeups of the page.


I had no 'e' letters left so I rearrange a "z."  Foam Thickers make that a lot easier.


The video at YouTube:


And here are the other videos in the MISTical March series:

A Magical Night - Titles
Stenciled Heart - Background Element
New Friends - Background splatters and an ATC Card
Technique Video - using Sunburst Stencil
Sand Art - using Sunburst Background

Thanks for visiting and watching!  I'm always on the lookout for what you want to see.  It is fun to explore ideas and find topics that interest everyone.  So if you have an idea for techniques you'd like to see a perspective on, let me know.

Friday, March 28, 2014

Repurposing office supplies to store die cuts


I have a ton of page protectors - not scrapbooking ones.  The ones I'm referring to are for 8 1/2" x 11" papers and are the non-glare type.  I used to use them in notebooks holding magazine clippings, home show photos and photos of my own projects to share with clients in the early days of my window treatment business.  In the last few years of my business, I stopped hauling around those heavy notebooks and used my laptop.  Those notebooks were invaluable for a long time, now they just gather dust.

So I've been breaking down a few at a time and I hate to throw away perfectly good page protectors. I also have a problem storing die cuts so the two needs have met in this project.

The video shares how to created the little pockets from a page protector.  You could do the same with a scrapbooking page protector as well.  You do need a sewing machine for this project.  Other than that, a Sharpie, ruler and good scissors will do it.

Watch at YouTube:


Isn't it rewarding to find new uses for old things?

Thanks for stopping by!  I'm off to a crop this weekend!  I'm so excited to put some faces to screen ids.

Thursday, March 27, 2014

Mother's Birthday Card


We celebrated Mother's birthday this week.  We had a lovely outing to a garden center, her favorite restaurant and mall and to an upscale consignment shop she really enjoys.

I made her card with a Prima ATC card.  This one I painted with some artists paints and a little water.  I liked how this came out better than the misted one I did on a page last week.  I did add a bit of Tatterned Angels mist over the top for shine.  The base is a piece of book paper I stamped.

When Lenny saw this card, he said, "It's over the top so it is perfect for your mother."  So true.


Thanks for visiting today!  Have you signed up for my free monthly newsletter?  Signup is on the sidebar of the blog.

Monday, March 24, 2014

Using a Sunburst Background


Last week I shared a video where I made 6 backgrounds using the Heidi Swapp Sunshine stencil, which I keep thinking of as a sunburst stencil.  Today, I have a process video and layout using one of my favorite results. This one was done on Stampin' Up! Bashful Blue cardstock with Mister Huey Honor Society Ink and then the Ring Doily Crafter's Workshop stencil and two shades of orange mist.

The page is about a decorative piece my husband bought at an art gallery last fall.  We enjoy going to galleries but 99% of the time, we are just browsing.  This time, he made a purchase which really surprised me.  He is very frugal and doesn't really like a lot of things - unless they relate to pinball and then he likes a LOT of things, but that is another subject.


We are enjoying this sand art piece from Exotic Sands.  It has several types of sand some of it very crystalized.  It makes beautiful sculptures.  I took a few shots of one of them building for the layout.

To continue the sand them, I used a textured embossing powder from Ranger on the die cut letters.  There is quite a bit of cardstock on this page.  The only designer paper is the bit of background you see behind the stenciled cardstock piece.  If you have a lot of cardstock and are looking for more creative uses, check out the Creative Cardstock class found here.

Now I could use your help.  If you watch the video, you'll see me trying to decide if the page needs some little orange sequin pieces cut from trim. Here are two versions of the layout.  The 1st one has the addition of the orange pieces.  Should I add those or not?  I just couldn't decide.


The video is found here or at YouTube:


I used one of last year's sketches found in the 2013 Sketchbook.  The original sketch was one photo and I've used two small ones.  Otherwise, I followed it closely.

Thanks for visiting today!

Friday, March 21, 2014

Sunshine Stencil Technique Video

One day I was in Michaels with a 40% off coupon - and a husband waiting in the car.  I don't remember what I was looking for that day but I wasn't finding it.  Finally I grabbed the Sunshine stencil from Heidi Swapp.  It was been hanging out in my stencil drawer for months. A few ideas would pop into my head but I did nothing with it until a few days ago.  Here are some of the things I came up with:

Watch at YouTube or here


My favorites are the last couple of designs.  I'll be using one of those in a layout and video next week.

Thanks for visiting!

Some new things: 

A free monthly newsletter with a subscriber-only video - subscribe on the sidebar at right.

A new Facebook page.  If you like Facebook, I hope you will "like" me.  The link is also on the right side of the screen or by clicking here: https://www.facebook.com/lisaedesign

Wednesday, March 19, 2014

Back on Facebook with a new Page and how to Get Buttons


Here is my new Lisaedesign facebook page: https://www.facebook.com/lisaedesign

I hope you will stop by and "Like" me.  I tried Facebook about 4 years ago and I didn't care for it (actually that is putting it politely.)  However, I have to realize that everyone is not like me.  (I know that amazed me too! :-)

Quite awhile back, I received some advice.  You have to be EVERYWHERE on-line to get your message out.  That doesn't mean that you have to participate heavily with every social media available.  I don't think anyone could do that and get anything else done.

The person who gave me this advice suggested picking the one or two things I really love and devote the most time to them.  However, be sure to have a presence in all areas.  Just because I like or dislike one service doesn't mean everyone feels the same way.

So I have a Twitter account, Flickr account, post in multiple galleries, use Pinterest, participate in scrapbooking message boards, use YouTube, and blog.  I haven't tried Instagram yet.  Perhaps that is next.  Who knows, I might love it.

YouTube and blogging are by far my favorites.   It is highly doubtful there will ever be information on any of my other accounts that isn't here on the blog first.

So however you like to enjoy social media, I hope you'll find my posts and videos.

By the way, I love using Pinterest but I realize I haven't been good about posting my own projects there.

You'll find all my social media links on the little green buttons in my sidebar.  Aren't they pretty?  I can't take credit for them.  For ages now, I've wanted to consolidate my various links.  I've seen this on many websites but couldn't find a gadget for it on Blogger.  I finally did a little searching and found the step by step process here on Sew Many Ways blog.  This is a sewing blog!  Yes, a fellow crafter gave the best step by step instructions for setting up your blog buttons.

And the pretty green watercolor button images?  Those are from Rose at Everylittlepolish, a makeup/style blogger.  So thank you ladies for providing the means to get those cute and convenient little buttons on my blog.

Why is it again that those Google and Facebook people make all the money when we bloggers are sharing all the ideas?

Thanks for stopping by!  I love papercrafting, learning from the crafting community and sharing my ideas.  So again, here's my Facebook link or you can use the little button if you "like" https://www.facebook.com/lisaedesign

Tuesday, March 18, 2014

MISTical March: Using BasicGrey's Spice Market collection


When I started my window treatment business in 1997, I thought everyone would be like me.  They would want to go to the fabric stores and go through bolt after bolt of fabric to find the perfect one. I quickly found out how wrong I was.

Most customers didn't want to go to the fabric store at all.  Most wanted me to bring samples to their home.  I also found that many preferred a good selection but not too many choices.  If their color scheme was a poplar one, the numerous choices just made the final decision harder.

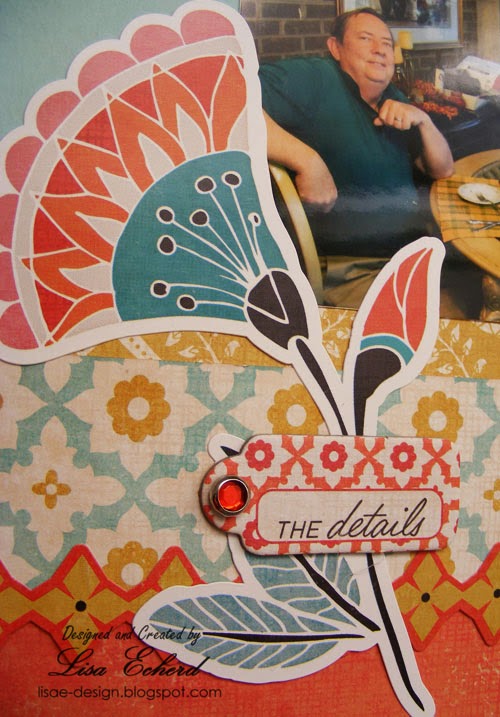
That is the situation I was in with these photos and the new Spice Market collection by BasicGrey. The photos looked good with almost every paper and embellishment I had!  It was really tough to narrow the choices.  In the end, my favorite paper didn't make the cut as the design just didn't go with everything else I liked.

For the page, I finally chose 2 pieces of chipboard and one large flower sticker for the embellishment groups.  To tie them together - something I really need on my pages - I used some rhinestone brads from Stampin' Up!


The wood veneer card is a new ATC card from Prima.  This was my first effort with the card and I used mists to add color.  That worked pretty well. I've since done another and honestly, artist quality paint works the best.  Still, mists can be used to color wood veneer particularly if there is some good 'teeth' to it.


I did some droplets of mist over the entire page to soften the look and spread out the fairly tight design.

The video at YouTube:


Sketch:


Thanks for watching!  Also, I have a new Facebook page and a newsletter.  Sign up for the newsletter on the right side of the screen and I'll send you March's newsletter with an exclusive misting video only for newsletter recipients.

Sunday, March 16, 2014

Extra video and New Monthly Newsletter

Would you like to see an extra misting video for this month? One that applies to both scrapbookers and cardmakers?  I know how much everyone loves crafting videos so I'm doing an extra technique video each month!

There is just one little thing you need to do.

Subscribe to my newsletter to see this special video.  I promise to keep the mailings to a minimum - once, maybe twice per month if I have some exciting news or special on a class or PDF.  I don't think any of us like to be bombarded with e-mails wanting us to buy this or that. So while my newsletter will announce and promote classes, it will mainly include content.  There will be at least 1 extra tip and a video each month.

And it is free!

So that is a great deal.  All you have to do is sign up.  The signup box is on the right side of my screen.  Just enter an e-mail address, name (optional) and then click on Subscribe.  You will be sent a test e-mail and asked to confirm.  That's it!

Now about that extra misting video, if you sign up, I'll be sure to forward the March newsletter so you'll have access to the video and can watch whenever you'd like. And in April, a new newsletter with exclusive video link will arrive in your inbox.

Thanks for all your support of my blog and videos!
Related Posts Plugin for WordPress, Blogger...